|
||||||||||||||
|
|
||||||||||||||
Course 3 – Carcase Construction - Small Box
Course Schedules
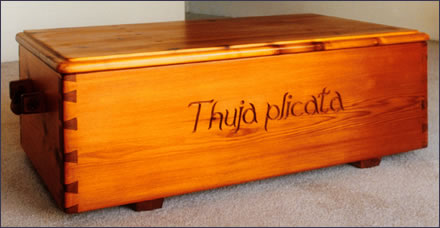
Course DescriptionThis is a ‘secondary course’ and is designed to demonstrate carcase construction with dovetails. It would be wise for a student to have completed a ‘starting point’ course like Course 1 – Frame Construction in Furniture or Course 2 - Stool or Table Construction before attempting carcase construction. The aim of the course is to construct a box with dovetail corners, with a lid and bottom made from solid wood. The box should not be more than 16” high so that the series of dovetails is not too complex for a first attempt. The length might be as much as 30” and the width 20”. These dimensions should be considered maximum limits. When dimensions for the box are finally decided by the student, it is recommended that an orthographic drawing be made of the design before work begins on this project. The lid may be sawn from the carcase or it may be applied, but the hinge mechanism for the lid must be considered from the outset. The lid option will be decided in consultation with the instructor. The box bottom may be housed in a groove and will preferably be made from solid material. It is recommended that for this project any fasteners, hinges and hardware, (like handles and locks) be sourced and purchased before construction begins. The initial hours of instruction and practice time for making the joinery samples, will provide enough time for these determinations to be made. Although there are several designs available for the small box project; the ‘cedar chest foot locker’ presented as an example for this project is simple and straightforward. It was designed as if it were made in a pioneer or isolated community where hardware was hard to find. In this example box, the handles are made of leather covered rope and the hinges are made of wood. In this case, apart from a few wood screws and the bronze pins for the hinges, everything was manufactured at the bench. Course Content
The cost of all materials (wood, glue, abrasive paper, finish
coatings, hardware |
||||||||||||||
| courses : tools : school : principal teacher : gallery : home | ||||||||||||||
|